Knit Meter

Showing posts with label Quilting. Show all posts

Wednesday, March 16, 2022

Two Gifts

As I said in my last post, I have been slow in posting photos of finished items because I had made a couple of gifts that I wanted to make sure were received before I posted. The gifts are very different but I enjoyed making them equally.

First is a tea cosy I made for my sister. This was a fun knit and I kept on laughing at how much work was going into a tea cosy. I followed the pattern as written and she loves it.


The yarn is Brown Sheep Nature Spun Sport, in Natural, Charcoal and Pepper. I don’t think that is true Starsky colours but close enough.

The other item I made was a coaster, or mug rug as people call them, for a friend who is going through a hard time. This is a knitter who I have met through a weekly Zoom call. Sending her yarn would have been nice but not exactly the thought I wanted to convey which was to send a hug. I was looking for heart patterns to make a coaster but didn’t like any I had found online. There was a heart on the monthly quilt I made. I adapted it slightly, omitting the wings and making the borders narrow. The quilting was simple straight line following the heart shape. I was pleased with the result which I called a mug rug hug.


Sunday, February 28, 2021

A Finished Quilt

What I wrote at the beginning of my last post still holds true. I have been working away on projects but nothing to show. But that is going to change as this post has a finished quilt and future posts will show two finished yarn projects.

I am (very) slowly working through this book  by Jenni Dobson. The patterns are labeled from beginner to advanced. The first one I made from left over fabric from my mother-in-law, but I liked the colour of the next quilt so much I had to purchase similar colours. In 2009! I don’t know when I cut the pieces for the quilt but it was sometime after 2013 and sometime after that for sewing them altogether. But I do know when I sandwiched the quilt as there is a record on this blog.

In the meantime I started the next quilt and now it is waiting for quilting. Although I said at the beginning of the year that would be the one to be finished next, I still have to find the right backing fabric for it. But don’t worry, I have purchased the fabric for the next quilt.

Finally my desire to have the quilt overrode the “I’m not good enough” thoughts in my head. And I’m so happy with it. I don’t mind that the pieces aren’t perfectly square; the quilting stitches are not even; the fabric on the back is not completely smooth. Nobody will be looking at it that closely.


Monday, December 28, 2020

A Bit of Christmas Sewing

This was the only handmade gifts this year. When I visited quilt shop in New Hampshire last year, so much I could have bought but didn’t. I did buy off cuts from fabric cut into jelly roll strips, I purchased two for 99c each.

I started the first one last year and made a jelly roll race quilt and added borders. Then the grandchildren went away for Christmas; now I had a whole year to work on them. So what did I do? Left it to the last minute to decide that the grandchildren would get quilts this year. My excuse for the delay was that COVID hit early in the year and there was no way I was going to Jo-Ann’s to purchase the extra fabric required. This thought stopped me entirely from starting the second quilt.

Having made the first quilt as a jelly race, I wanted the second quilt to be different as the strips were the same. I found a pattern for a star quilt using 2-½ inch strips. The down side of this was that as the strips were from left over cuts, not every strip was the same size. The advantage of making things for children is they don’t care how well something is made. Just if they like it and if it is comfortable.

I forced myself to Jo-Ann’s – twice in fact. Purchased two sets of fabric for backing and three sets for borders. The left over strips were used for the binding. I had plenty of batting in stash. Luckily it was batting that did not require a lot of quilting so I was able to minimally quilt these. (The weekend before Christmas.) I have decided that I no longer wish to hand sew bindings onto quilts. With these I sewed them to the back and then folded over to the front and sewed close to the fold line. I think the look is fine and much sturdier than hand sewn.

I knew I wouldn’t have enough of the backing fabric for one quilt but as I had fabric left over from the border I added that.


The children love them; although I think they prefer the back to the front. Oh well. I enjoyed making them.

Thursday, December 10, 2020

I Sewed Something

Although I haven’t shown any sewing for a while doesn’t mean there hasn’t been any going on. With grandchildren learning at home my time for sewing has been reduced but after I finished the year quilt, I sewed a quilt top. I don’t have any pictures of the completed top and I am not at home to take one but here is a photo of the quilt in progress. All the fabric used is leftovers but I will have to purchase some fabric for the backing.


Now for my favourite to date sew. My granddaughter is supposed to wear a school t-shirt on Fridays but she is a dress girl and did not like having to do that. I said I could turn it into a dress if she wanted. That never happened but she didn’t forget what I had said. We were going through my fabric to see what she liked and there was a piece of fabric that she had chosen that had not been used.


The next thing I know Dad and granddaughter give me this so I can turn it into a dress with the fabric. The size was fine for wearing as a t-shirt but not as a dress if you want to showcase the unicorn and the fabric. I debated getting the same t-shirt in a smaller size and if this wasn’t the time of COVID I would have done. 


The body of the t-shirt needed to be shorter, so that meant cutting top and bottom and the width of the shirt needed to be reduced. These cuts also meant I had to adjust the armholes. First I made a paper template from the t-shirt of the sleeves and neckline then I cut the bottom of the t-shirt to just under the design. I cut closer to the design than I had intended despite working out seam allowances etc. Next the sleeves were cut off and the neck re-cut and bound. The pink fabric for the binding was a stretch fabric I had been given and kept even though I didn’t know what I would use it for. (It has been the lining in at least one bag.) And then came danger! Not only did I use my serger to sew the side seams. I had the blade in place to cut as I sewed. Sleeves were bound and the top was finished.

The skirt was simple. Two pieces of fabric seamed, hemmed and gathered. But how to join to the top? For some reason I did not want to join cotton fabric directly to the t-shirt and I did not want exposed seams. Once again the pink material came in handy. I cut four pieces the width of the shirt plus seam allowances and made two circles. The skirt pieces were gathered to fit the circle and placed between the two pieces. Then I sewed the right side of the top to the right side of the band. On the inside I was going to hand sew the band to the inside to enclose all the raw edges. But I did not feel like doing that and wondered how well it would stand up in all the machine washing. In the end I zigzagged from the right side and that worked well.

What have I learnt from this? I can make things without a commercial pattern. It might have been easier to have purchased a pattern to use for the top part of the dress. Don’t cut the neck opening as wide. Cut the waistband wider so that it is easier to cover the raw seams.

Having finished it I was still worried that my granddaughter wouldn’t like it. After all I didn’t know what she was envisioning and the t-shirt part was now quite different. 

But she loved it and had to wear it every day.


Thursday, August 20, 2020

My Year Quilt is Finished

Last time I wrote about this quilt was February last year when I had finished the last squares and was deciding what to do with them. Looking back at my posts, I am surprised that I have not written anything about my choices and the process.

In my post I said that I had purchased fabric to make the squares all the same size. I started out by adding a small border to the largest square and then sized all the squares to that. As the point of the quilt is the individual squares, I placed sashing between the squares. But I also wanted a quilt I could use so then borders were added and then it was sandwiched and then it waited. Another quilt waiting to be quilted. 

In the end I repeated to myself “finished is better than perfect” and just got on with it. Also I told myself that I couldn’t sew anything else until this was completed. (I broke this self-imposed rule when I had to make masks.) The action of quilting was hard because of the weight of the fabric so each session was no more than two hours. But a little here and there added up and I had a finished quilt. As I was not working on anything else I kept the walking foot on my machine the whole time as it is fiddly to change. (This has made me think that it would be nice to have a basic machine that I can keep set up just for quilting.)

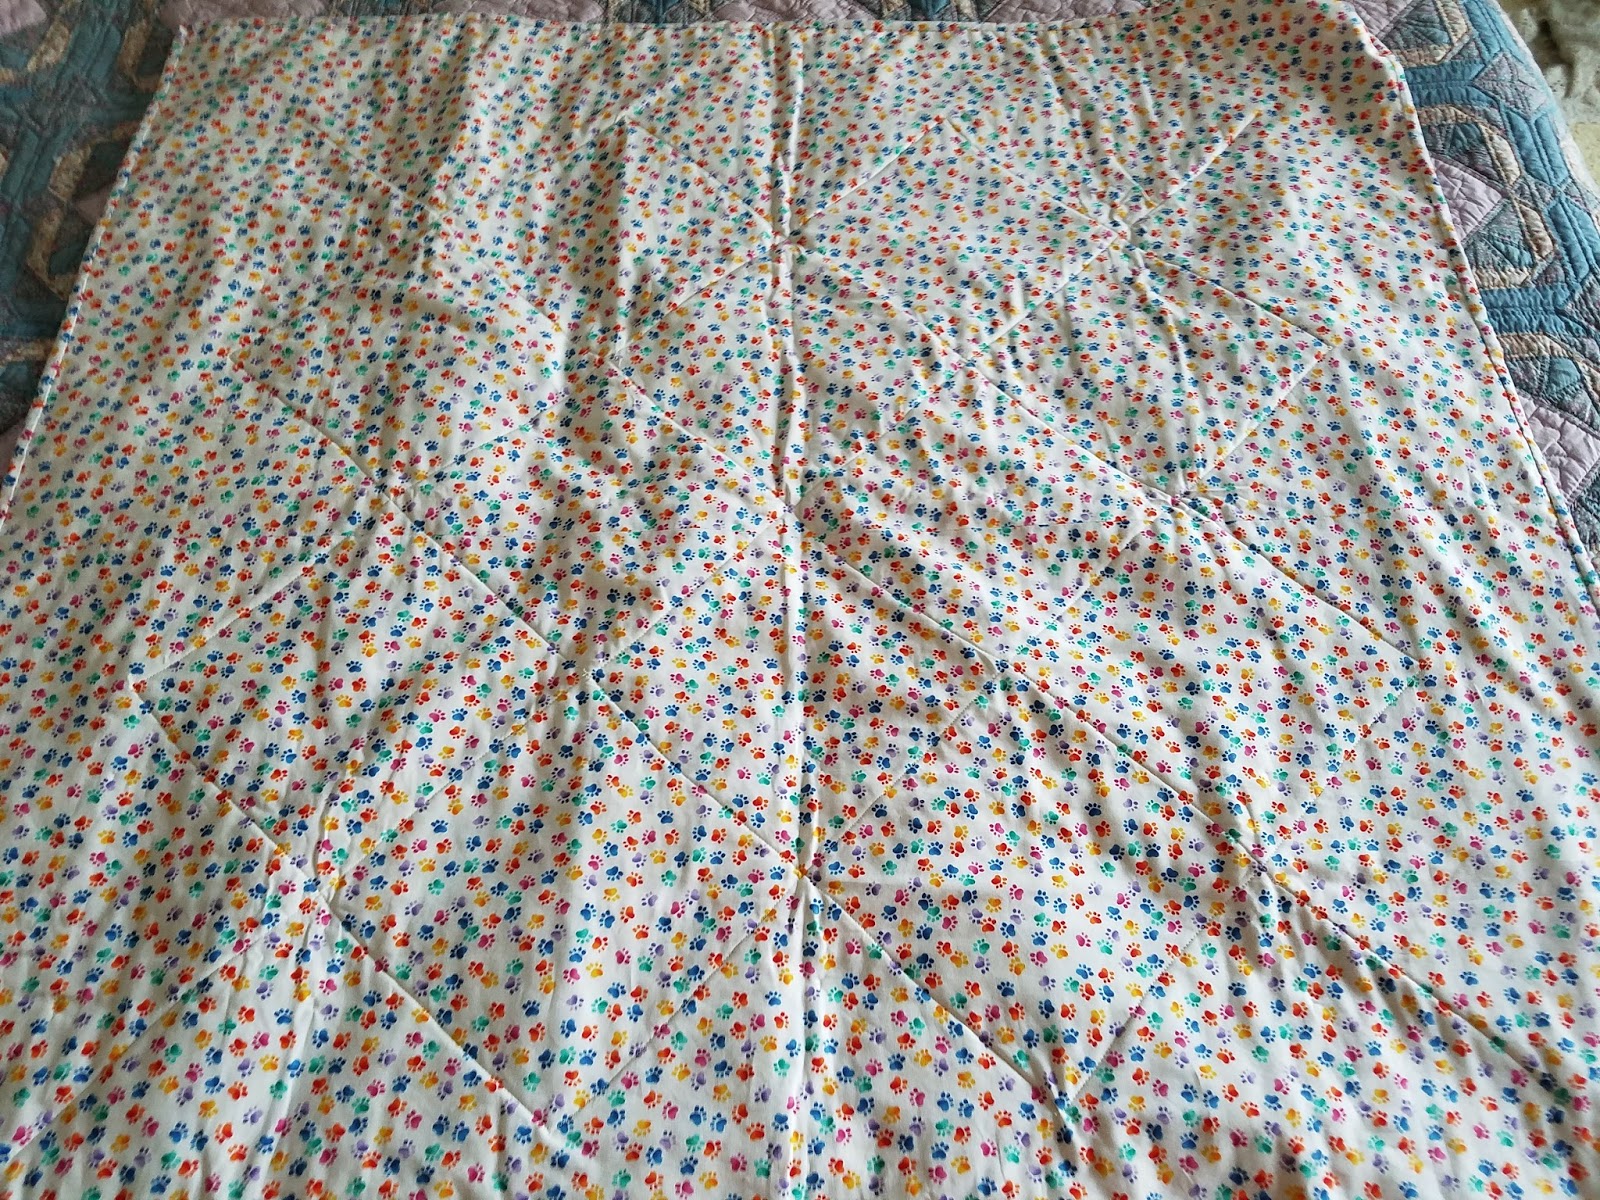
There was no plan for the quilting. Just some circles with the darning foot and a lot of straight lines with the walking foot. As I got closer to finishing I started to think about the binding. The fabric I used for the back of the quilt was extra wide and I had just enough in the length to make a self-binding. I trimmed the backing to ¾”, folded in half, folded this over the edge of the quilt and then machined. As this is a quilt for us I did not miter the corners. I tell you, machining binding is the way to go.

I am really pleased with the result.


Oh, and as the impetus to finish this was so I can make some clothes for the family with fabric I’ve had for a while, what did I do? Start a new quilt completely from scraps!

Monday, April 1, 2019

Baby Quilt

I have finished the quilt for my nephew’s (unborn) baby.) I have not shown any photos of it in progress so before I show the finished project – a few works in progress. I used this pattern. I have made this quilt before for my other nephew’s second baby but I finished that one in a different way and used much different fabric. (Although two of the squares crept into this blanket because I thought I needed two more.)

I do not have any photos of the strips before they were cut but here is the final layout before and after sewing.


As there are so many colours and designs I added a narrow border (1/2 inch finished) before deciding on what I wanted as a wide border. But once I added that narrow border I knew it did not need anything else. You’ll have to make do with a photo of the quilt laid on the backing.


I used the same fabric for the binding so as to not detract from the quilt. Here’s a photo of an uh oh moment. I had plenty of binding so how did this happen?


I trimmed both ends 2 ½ inches from where sewing started and stopped. So I unpicked the start and end of the binding for a few inches and sewed the cut binding back on, good thing I had plenty, and then finished properly. But when I had sewn the binding onto the front I had another hmm moment. This is a baby quilt, how much use and washing will it get? I don’t really want to hand sew the binding I should have machined the binding to the back and then machined from the front. Which I have never done by the way, hence not thinking about it. I used Wash Away Wonder Tape to attach the binding to the back before machining and then gave it a quick rinse in the washing machine to remove the tape. The quilting is simple straight line quilting on the inside of the long pieces of each block and after completing the binding I added straight line quilting on all the outside blocks.

I am really pleased with the finished quilt. All the fabric is from stash including the backing which was enough to join two pieces down the length.


Sunday, February 24, 2019

And Sewing It Is

Because it is easier for me to take pictures of small flat objects. Here are the last two blocks for my block of the month.

First is December’s.


The only reason this didn’t get made in that month was that I ran out of time. The green is from the fat quarter I bought to make March’s square. It seemed excessive at the time to buy a whole fat quarter for a small requirement but it has been used in many of the blocks. The yellow is from the fabric I purchased for August’s square. All the other fabric is left overs from various projects.

September’s square was delayed as I could not make a decision about which fabric to use. There are small amounts of six different fabrics; the example used plain and print fabrics. I have plenty of prints but hardly any plain fabric but I did not want to buy more fabric as such small amounts were required. In the end I went with a background fabric that showed quite a bit of white.


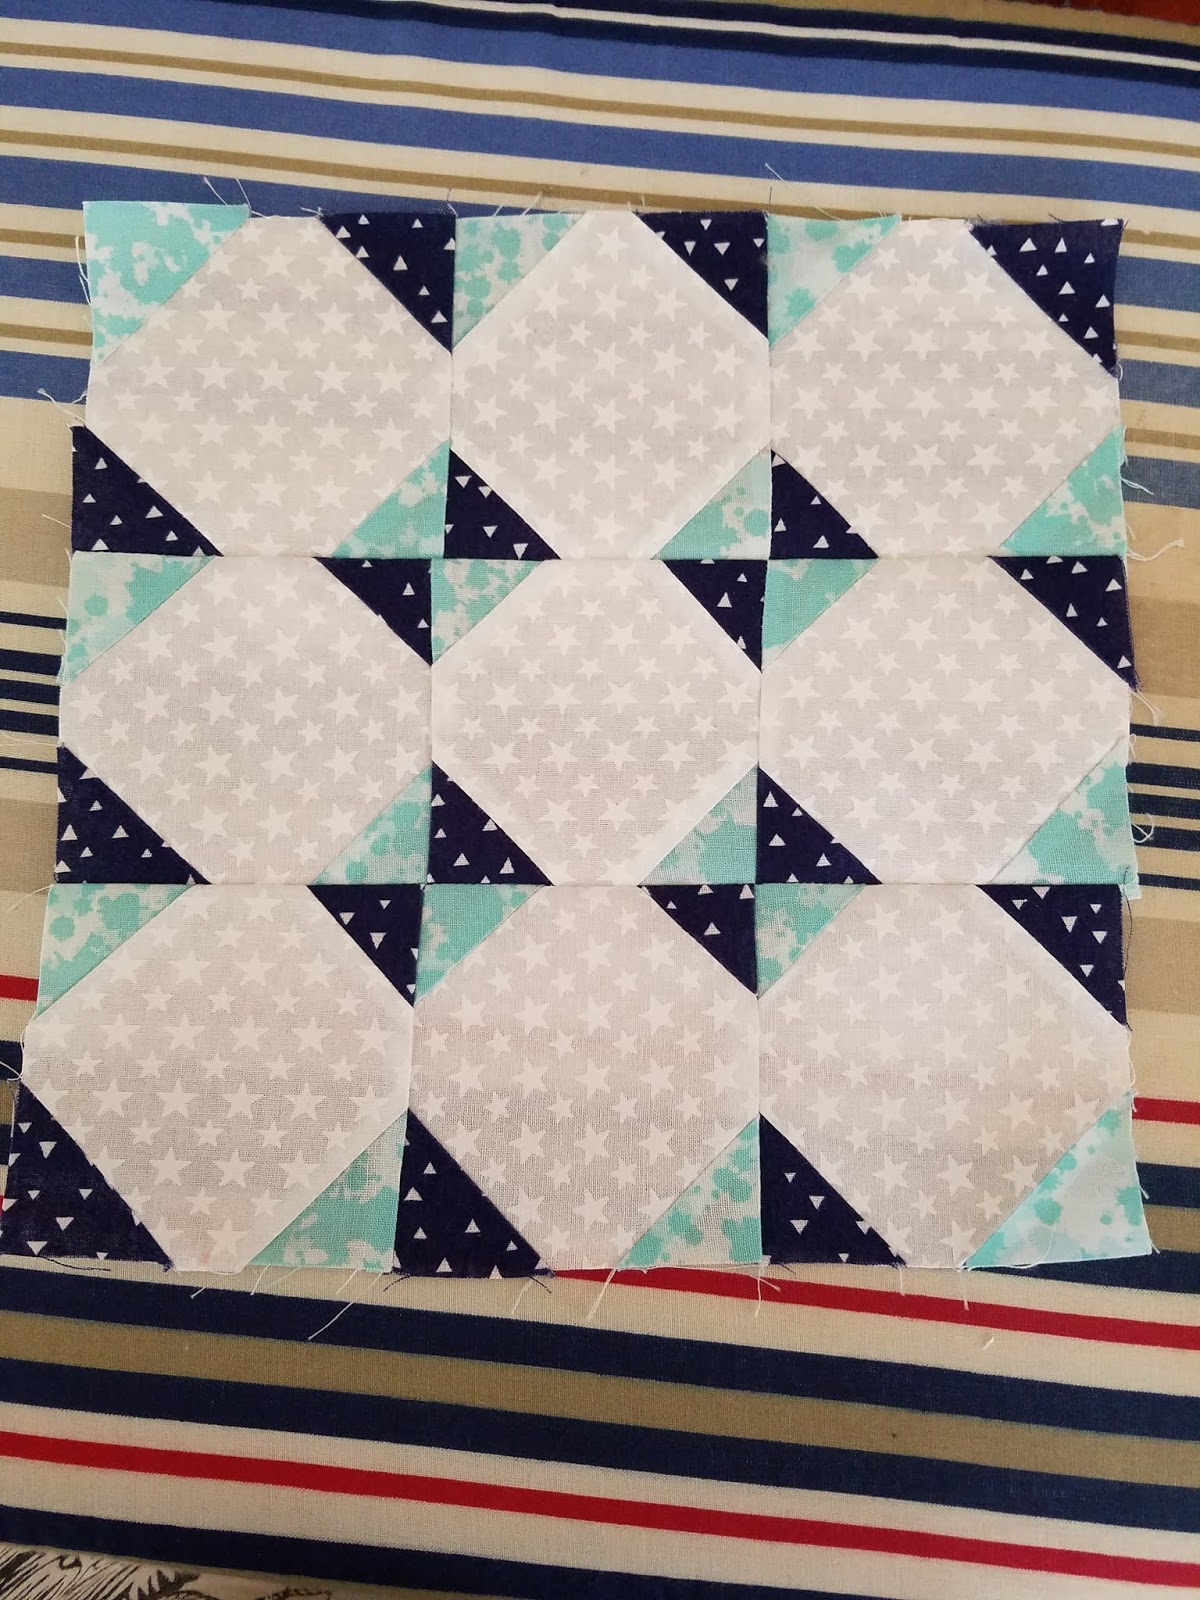
The theme for December was half square triangles and for September was corner square triangles.

Now I have finished the squares, what to do with them? They are all different sizes ranging from 6 inch square to 13 inch square and some are rectangles. The first thing to do is make them all the same size, so I purchased some plain colour fabric in Jo-Ann’s sale. I had worked out how much I needed and then rounded up to the next yard to allow for any mistakes. The cutting is something I will want to do when I am not going to be interrupted! When I have twelve squares all the same size I can decide on sashing and borders.

Friday, January 25, 2019

My Last Block Isn’t The Last Block

This week I sewed January’s block. As I started the blocks last February, this should have been the last one but I still have two more to make. December’s, because I just ran out of time and September’s because I couldn’t make a decision on the fabric.

The technique for this block is corner square triangles and I thought it would take a while to make as I had to cut nine white squares and 18 of each of the other two colours. But it did not take long at all and I made the square in between sewing squares for a baby blanket. All the fabric was in stash which made me happy. Now, to make the two missing blocks.


Saturday, November 24, 2018

Some Blocks

The last block I showed was for August. I did not make September’s block because I did not know what fabric to use. Nothing I had in stash seemed right but I did not want to buy any. I will make this the last one and if I have to buy fabric so be it.

The block for October is really rather fun but as I did not make it until the end of the month I decided to wait until I had made November’s and show them both together. The fabric is all from stash, although the green stem and both the fabrics for the outside of the pumpkin are leftovers from fabric purchased for other blocks.


When I had finished October’s block, not only did I choose the fabric for November’s but I also cut it out so I was all ready to sew. This was all leftovers too.


Tuesday, October 16, 2018

Sewing Too

After making the decision to work only on WIPs until 1 December, I decided to apply this to sewing projects as well. Although, really, I don’t have sewing WIPs I just have the one that I should finish before starting anything else.

The languishing sewing WIP is a quilt which was my only sewing project at the beginning of the year until I hit a snag. And then it was side lined for all the garments. I purchased all the fabric for this quilt at the same time, including the backing. But when I finished the quilt top and compared the amount of backing with the top I did not have enough backing fabric. I checked what I had purchased against the pattern and I had bought the correct amount but the pattern had not taken into account that you needed two widths of the fabric. I was disappointed as I had specifically purchased the backing fabric at the same time as the main quilt fabric as it was the same style and so I had everything to make the quilt. I now had to decide if I wanted completely different material for the backing or if I wanted to piece the fabric I had with another fabric. Whatever choice I made I had to go shopping. I bought something quite different but coordinating to use as a centre panel with my original choice as the side panels.

By choosing to work on WIPs I finally sewed the two fabrics together and this weekend I trimmed then and sandwiched the quilt.

Here it is all pinned and waiting for me to quilt on my new machine.


Wednesday, August 22, 2018

August’s Square

I made August’s square last week. I was expecting it to take longer to make than it did because it looked like there was a lot of work plus when I had just sat down to sew I had some unexpected child care. With respect to the latter I was able to sew while he played with cars and regarding the former I could do a lot of chain piecing.

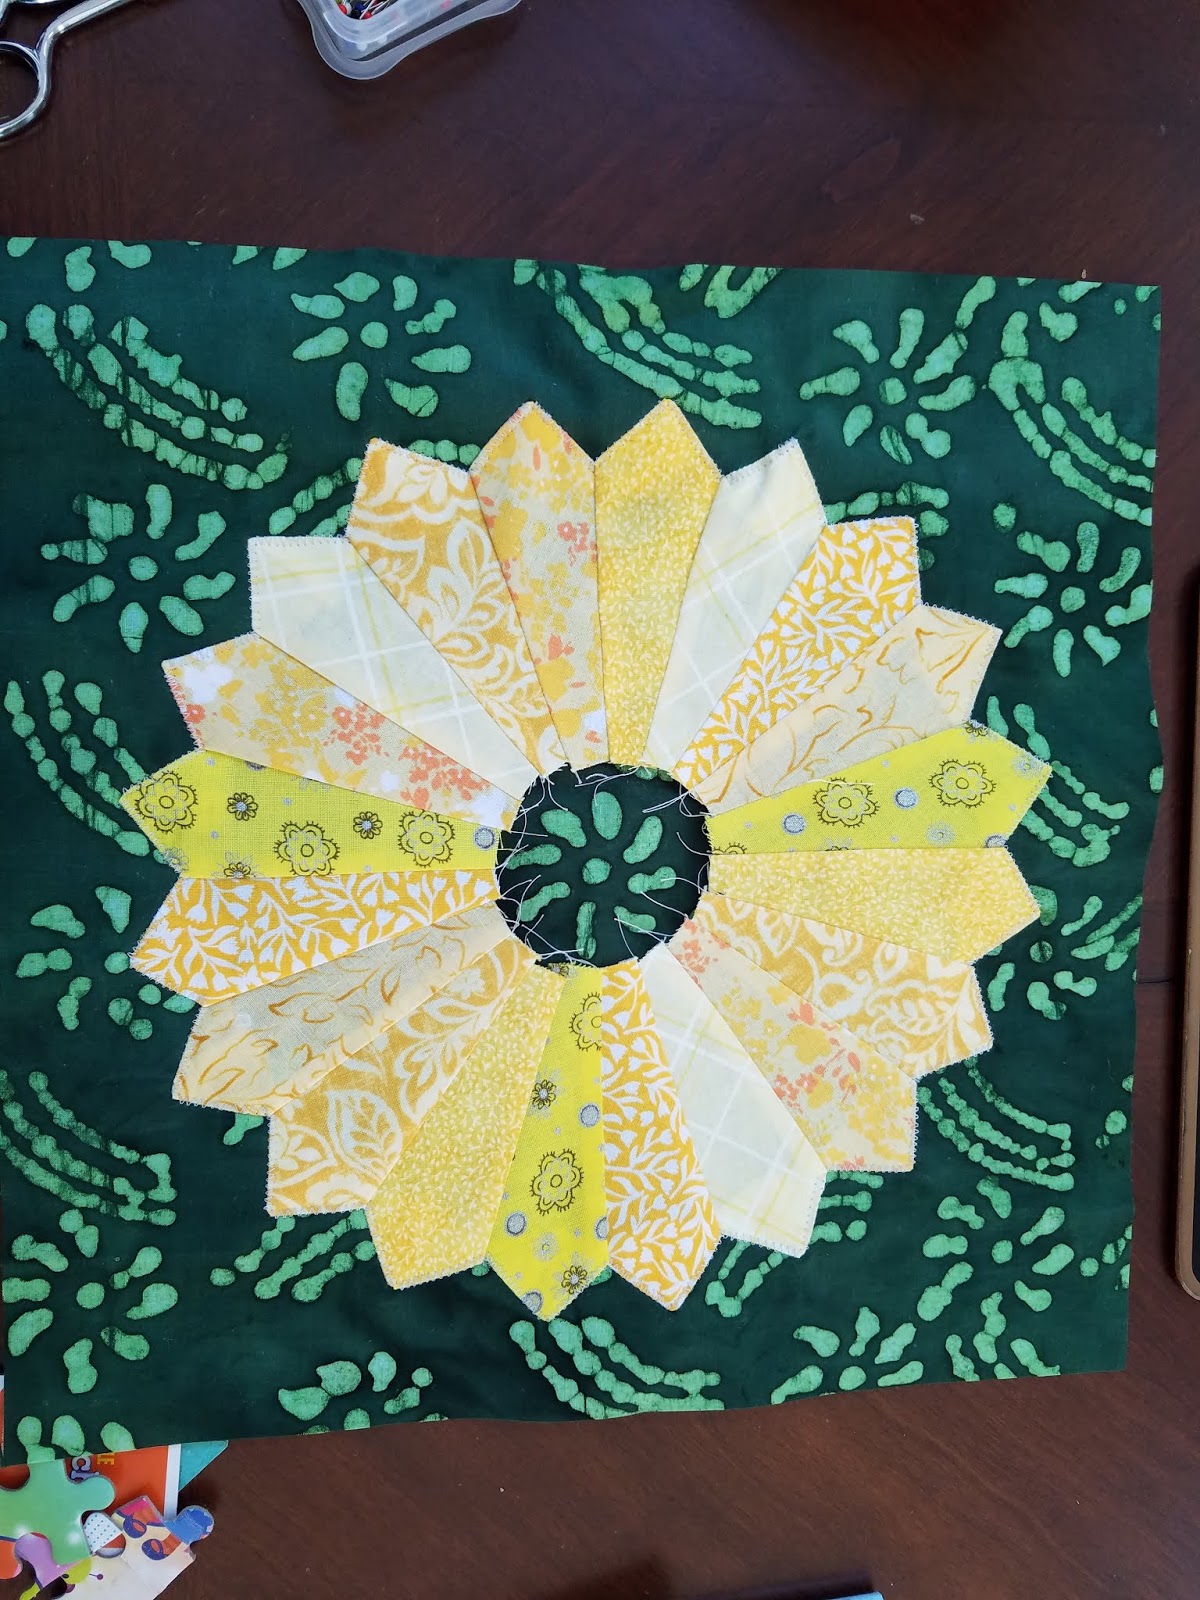
This block was labeled as appliqué but making a template was also involved. The flower has 20 petals. I had scraps of yellow in four different colours but decided to buy some more. An eighth-yard in three different colours when on sale at Jo-Ann’s does not cost very much. A template was made for the petals and the cutting out did not take long as I was able to layer two or three fabrics and then cut out with a small rotary cutter. Each petal was sewn across the top to make the point, turned to the right side and pressed. I then sewed the petals in pairs. I didn’t have any order for this, just made sure I didn’t have two of the same. Some of the pairs were sewn into four groups of four and then two groups of ten were made. These two groups were joined into a circle.

Here’s photos showing them before and after pressing.


The circle was then sewn to the green square – the appliqué part. There was no way I was going to do this by hand so I used zigzag stitch. I am very pleased with it; also very grateful for the needle up/down function on my new machine. The green is from the fat quarter I bought for March’s square. I am happy that I had a big piece in stash.

Flower sewn to block.


The centre of the flower is appliqué and a new to me method. The circle is cut larger than the template, running stitches made in the seam allowance, gathered around template. This was easier than expected as I had never done it before. The secret is to make stitches small and make sure they are all the same distance from the edge.

Finished block. This is the largest one so far.


Friday, July 27, 2018

June and July

My last post was grateful for sewing so that I had finished items to show and this one is all about the sewing too - quilt blocks.

I did not make a block in June as we were away for a couple of weeks and I just did not have the time to sew it. We're nearly at the end of July and I decided I better make the July block otherwise once I was two months behind would I continue with making them. As it turned out, I was able to make both blocks in the same day. Both blocks were made with scraps.

I am really pleased with July's block. It was another foundation paper piecing. They are so fun to make and you have the lines to sew on. This is a very summery block as it is a row of beach huts. Yes it is all scraps but the white was purchased for the bodice lining of the ill-fated Sofia dress.


As I had time left I made the June block as well as it did not have many pieces. But it was harder as there were curved shapes. I did not do as well with this as I did the umbrella in April but it will do.


When I have finished a block I look at the next one to work out what fabric I need and have everything ready to go. I will have to buy some fabric for August but I can purchase 1/8 yard at Jo-ann so I will not be adding greatly to my stash.

At the time of writing, I am very close to finishing one of my knitting projects and I have purchased a replacement needle for the Changes shawl. So who knows? Maybe the next post will be about knitting.

Sunday, April 8, 2018

April Showers

That is the name of April’s block which I completed this week. This block included a new to me technique – templates from freezer paper. Also I had not sewn concave and convex shapes together before. The instructions were straight forward on how to sew them.

I did buy some fabric for this block. When I was buying the fat quarters for last month’s block, I noticed some fabric and thought it would be perfect for the back ground of April showers. The other two fabrics were in my stash.

Saturday, March 17, 2018

Where’s the Knitting?

Last time I said a project was blocking and another was close to being finished. So why is this another sewing post? Because I made the block before completely finishing the project that was blocking. Yes I sewed before sewing in ends and a project is not finished until it is blocked and all ends sewn in. (Yes all two of them.)

In February I talked about a block-a-month. As I had been away I could not make March’s right at the beginning of the month but I made it the first free day I got so that I did not fall behind. Although I would like to use stash as much as possible, I bought two fat quarters for this square – for the background and the green stems. This block was labelled as foundation paper piecing which I had not done before and I thought was rather fun. There were a couple of mistakes in the instructions. One was minor; it said to cut one stem although you needed two; but the other was to trim the squares to their post-seaming size not pre-seaming. As all these blocks are going to be different sizes, it wouldn’t have mattered but the other pieces of background had been cut to the bigger size.

I’m enjoying making these blocks each month. OK I know I have only made two. Knitting content will happen next post but in the meantime I have set up a new account with KnitMeter so that I can show off record how much I have made.


Saturday, August 26, 2017

Sew Many Bags

I mentioned that I had been laid up with an injured foot and had been doing quite a bit of sewing as well as knitting. Today I am going to show you all the bags as well as one I had made a little while ago but forgot to show.

On Ravelry there is a thread titled show me your homemade project bags, please! which was started way back in 2014 and now has over 6500 posts, although many of those are love that and variations. I am slowly working my way through this thread and making note of/bookmarking any patterns that I think I would like to make.

Which brought me to this tutorial. One of the things I liked about it was I could use many leftovers. I liked the end result so much that I am going to keep it for myself. I also liked the style so much that I made two more that will be gifts. All three bags were made with leftover fabric; the only purchase was the cord for the drawstring as I did not want to use fabric.


This is the first one. I used ribbon yarn for the drawstrings to see how that would work but did not like it. The black fabric was left over from the binding for this quilt; the rim was in the pack of strips I used to make this quilt; the handles were from this quilt and the cover was left over from the backing from this quilt. The lining, which you cannot see, was fabric I had originally purchased as the backing for that quilt.

Having made one, I had to make another.


The black fabric and the yellow fabric are the same as for my bag; one of the orange for the handles was left over from my Jelly Roll Quilt and the other orange was from the same quilt as the handles for my bag; the cover and lining which you cannot see were from a fat quarter which I had in my stash for some other bag which didn't get made!

And having made two, I had to make another. This one out of canvas fabric I had left over.


The main blue flowery fabric and the lining, which you cannot see, are left overs from this bag; the rim, handles and cover are remnants from this bag.

The changes I made to this tutorial: add interfacing before sewing bottom seams; add interfacing to both sides of the rim (I did this by mistake to the first one); do not stitch any of the top edges/rim edge before joining rim, outer, lining. Also, as suggested, I cut the cover fabric wider to make enclosed seams and top stitched to enclose all raw edges.

Having made three of these bags, and I'm sure there will be more, I went on to another design. A bag made with a metal ruler at the top to make a snap bag. I had made one a while ago to make a glasses bag for my husband. I remember it being really fiddly and I searched for different tutorials but ended up with the one I had originally adapted as it had no enclosed seams. This time I decided to follow the instructions as written. i.e. use the same size fabric pieces.

First, of course, was to make one for myself. The one on the left in this photo. (The photo I took of it on its own is blurry, I could take another one but by the time I take one I am relatively happy with and upload it, months will have passed.)


As you can see the outer colours match my bag. The one on the right was made from bag scraps. I made another two out of bag scraps. These bags are quick to make until it comes to sewing down the casing for the ruler. On the last one I made I sewed the casing by hand and added the ruler after I had sewed about two-thirds around.

And there's still more. I have already mentioned my Jelly Roll Race quilt. I have some of the diagonal parts left over and I decided one was big enough for one side of a bag.


As this side was patchwork I decided to make the other side patchwork with left over fabric.


I sewed scraps together and then cut out the same size as the piece I already had. I did not want to lose the patchwork effect on the bottom of the bag so I added the plain beige from a fat quarter purchased and never used for its original intent. (See above.) I also decided to add a small piece at the top. I also added the strip on the lining so that the zipper is joined to the same fabric inside and out. I am pleased that as well as a handle, I sewed a little tab at the other end. I also like the fabric pieces I sewed at each end of the zipper but wish I had remembered to top stitch after sewing the side seams. This is a nice size bag maybe I should use it for the mystery shawl.

And I am going to take a break there as this post is already long. Next time I will post photos of two other bags I made. As well as the one I forgot to post,


Sunday, May 14, 2017

Sewing, Knitting and Ravelry

A couple of finished items – one sewn, one knitted.

Way back in November last year, I posted pictures of the quilt I made for my grandson. This meant I had to make a quilt for my granddaughter and I had to finish it quickly because she told me that I could not give him his until she had one. Even so, I still took about 5 months to come up with a completed project.

I had seen a quilt kit in Missouri Star Quilt Co. catalogue and as I had a charm pack and jelly roll (yes the last of the poor quality ones) I decided to make my own. I also decided to follow the procedures in Quilt as you Go Made Modern. There were advantages and disadvantages of this. The way Jera Brandvig works her quilt as you go, is to sew pieces onto batting squares then sew the squares together to make a quilt top and then add backing. The disadvantage of this method is all the fluff that goes into your machine from the batting and you still have to add some quilting on the whole quilt when you add the backing. I have seen a YouTube video by an Australian quilter who shows how to quilt as you go complete squares and how to join them. One day I will do that. (As an aside, I did clean my machine and change the needle when the quilt was finished.)
The pattern is a modified log cabin (off to google search to see if there is a correct name) and the advantage of Jera Brandvig’s method was that I felt each square had some stability and the quilting was easy but I did not like the thickness of each seam.


I needed fabric to tie all the squares together and purchased the green and the lilac, which are glittery butterflies, for the sashing and borders. Of course I changed my mind once I started sewing the squares and decided to have the lilac on just two sides of each square; my original plan was for each square to be bordered with the lilac. Changing my mind turned out to be a good thing because by the time I got to the binding, I didn’t have any fabric. I could not remember what my original plan was or if I even had had a plan. I did not want to use the backing fabric as it would have been too much of a contrast although I have plenty of it. (The quilt is more than one width’s of fabric.) I did not have enough of either the green or lilac fabric for the binding but by joining them together, alternating colour, I had enough and, I am sure you can agree, it works very well.

Both quilts were duly given to the children and appreciated.

I had a very small amount of the lilac fabric left and just over a very small amount of the green. So I made a bag.


By small amount you can see that I had to join the green and that there was just enough lilac to make the drawstrings. The pink lining you can just see was given to me.

The knitted item that I finished is the hat that I started as part of a KAL and I didn’t think I would finish in time. But I did and I am really pleased with that.


The yarn is Red Heart Soft – not the best yarn for colourwork but I wanted to use something where it didn’t matter what happened to the hat. I already had the Off White in stash and I purchased the Teal when it was on sale. I am mostly pleased with it. There was no row gauge given in the pattern and my hat was already to length when I had finished the snowflake. As it is a slouchy pattern it doesn’t matter that mine is a bit longer but I could have started the colour straight after the rib. As this is a pattern worked in the round, I do not like the way the pattern looks at the round join. Nobody else has mentioned this and I think it would have been less obvious if I had used a wool yarn. It does not show when the hat is worn.

And Ravelry. I mention Ravelry quite a bit in my blog because that is how I find most of the patterns I make. Either by searcing on Ravelry or because it has been mentioned by a friend or in a thread. Recently I listened to a podcast where the creators of Ravelry were interviewed. It’s actually quite a long interview. This is not a podcast I listen to so I do not know if this is standard for her and I do not know if they have given other interviews of such length. I thought some of my readers might find it interesting.

(I have to confess though, the speech is interspersed with multitudes of “you know”s which drove me crazy.)

Wednesday, November 23, 2016

Boy Quilt

I have finished another quilt. I have said that I don’t keep a record of when I start quilts. As I have that option for yarn projects on Ravelry I need to find a way to remember to record start dates of quilts. Although maybe it would be better to record the dates of various stages of a quilt. For example, yesterday I looked at the fabric for my next quilt and decided which colours to go next to each other. Is that the start date? I had a charm pack of 5-inch squares although they weren’t square so yesterday and today I squared them up – is that the start date?

Regardless of the actual start date, I do know that with this quilt I changed my mind on the final design between purchasing the fabric and finishing the quilt. The central design didn’t change but the borders did.

This is the pattern with a jelly roll that I purchased earlier this year from Jo-Anns – I know I said I wouldn’t buy anymore from there – don’t worry I only bought two! This one was cut straight.

My original plan was to finish the quilt using the self-binding baby quilt. Of course I changed my mind after buying fabric! I still used what I had purchased for the backing but purchased a different fabric for the borders. Which left the corner squares; as I really like to have those in a different fabric from the borders I used squares left over from this quilt.

It is a brightly coloured quilt; ideal for a little boy.

First photo attempt - somebody wanted in on the action.